


If you've taken a vinyasa class anywhere in the last forty years, you've done sun salutations. Maybe you've done them so many times you don't think about them anymore — they're the thing the teacher uses to warm you up before getting to the "real" practice. This is too dismissive. The sun salutation, in either of its main forms, is a remarkably complete piece of physical training compressed into about a minute of practice, and how well you do it largely determines how well the rest of your practice goes.
Here's what each pose in the sequence is actually doing, where most people lose efficiency, and how to think about progression and modification.
The two main versions
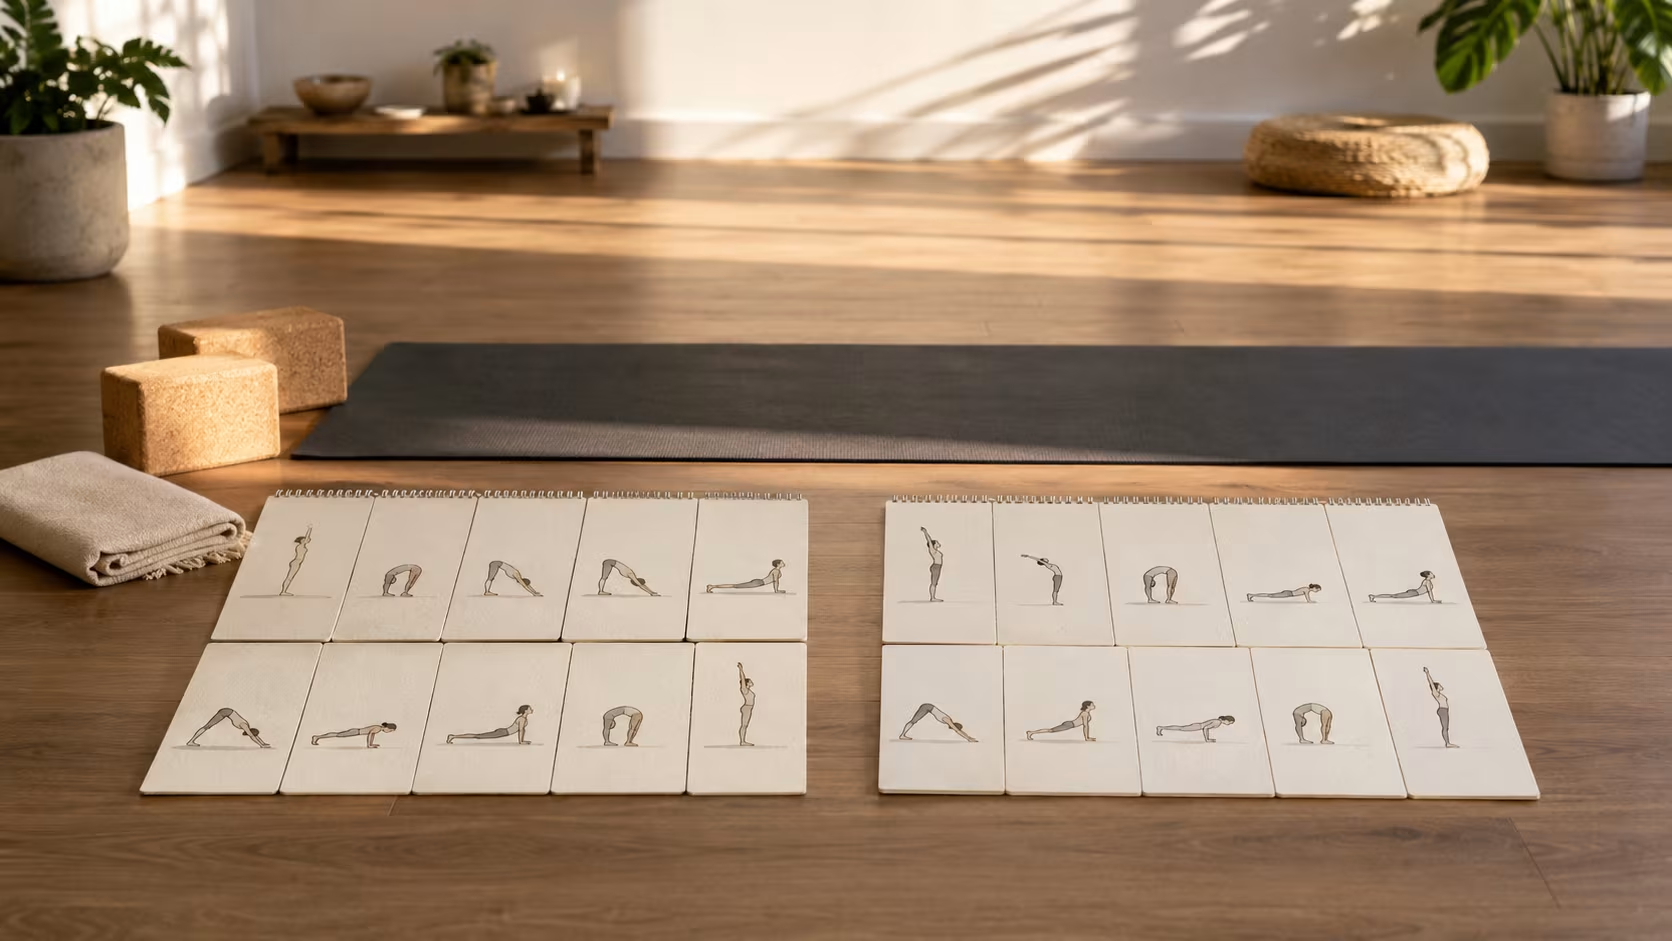
Sun Salutation A (Surya Namaskar A) is the shorter, more flowing version. The basic sequence: stand in mountain pose, inhale arms overhead, exhale fold forward, inhale halfway lift, exhale step or jump back to plank, lower through chaturanga, inhale to up dog (or cobra), exhale to down dog, hold for five breaths, jump or step forward, inhale halfway lift, exhale fold, inhale rise back to mountain.
Sun Salutation B adds a few elements. After the initial mountain, you bend the knees into chair pose (utkatasana) before folding forward. The second time through the chaturanga-up dog-down dog cycle, you step the right foot forward into warrior I, then back through the cycle, then warrior I on the left. This makes B both longer and more leg-intensive than A.
Most modern vinyasa classes use B with variations and additions. Ashtanga uses both A and B in fixed sequences as part of the primary series. The shapes are similar enough that everything that follows applies to both versions.
The sequence is old, but how old is contested. Some sources trace it to ancient Surya Namaskar practices in the Vedic tradition. Other historians, particularly Mark Singleton, argue that the sequence as commonly practiced today is a 20th-century synthesis incorporating both Indian yoga and European gymnastic influences. Both can be true at once, and neither matters much for actually practicing it well.
Mountain pose: more than just standing
Mountain pose (tadasana) gets dismissed by beginners as "just standing." It's not.
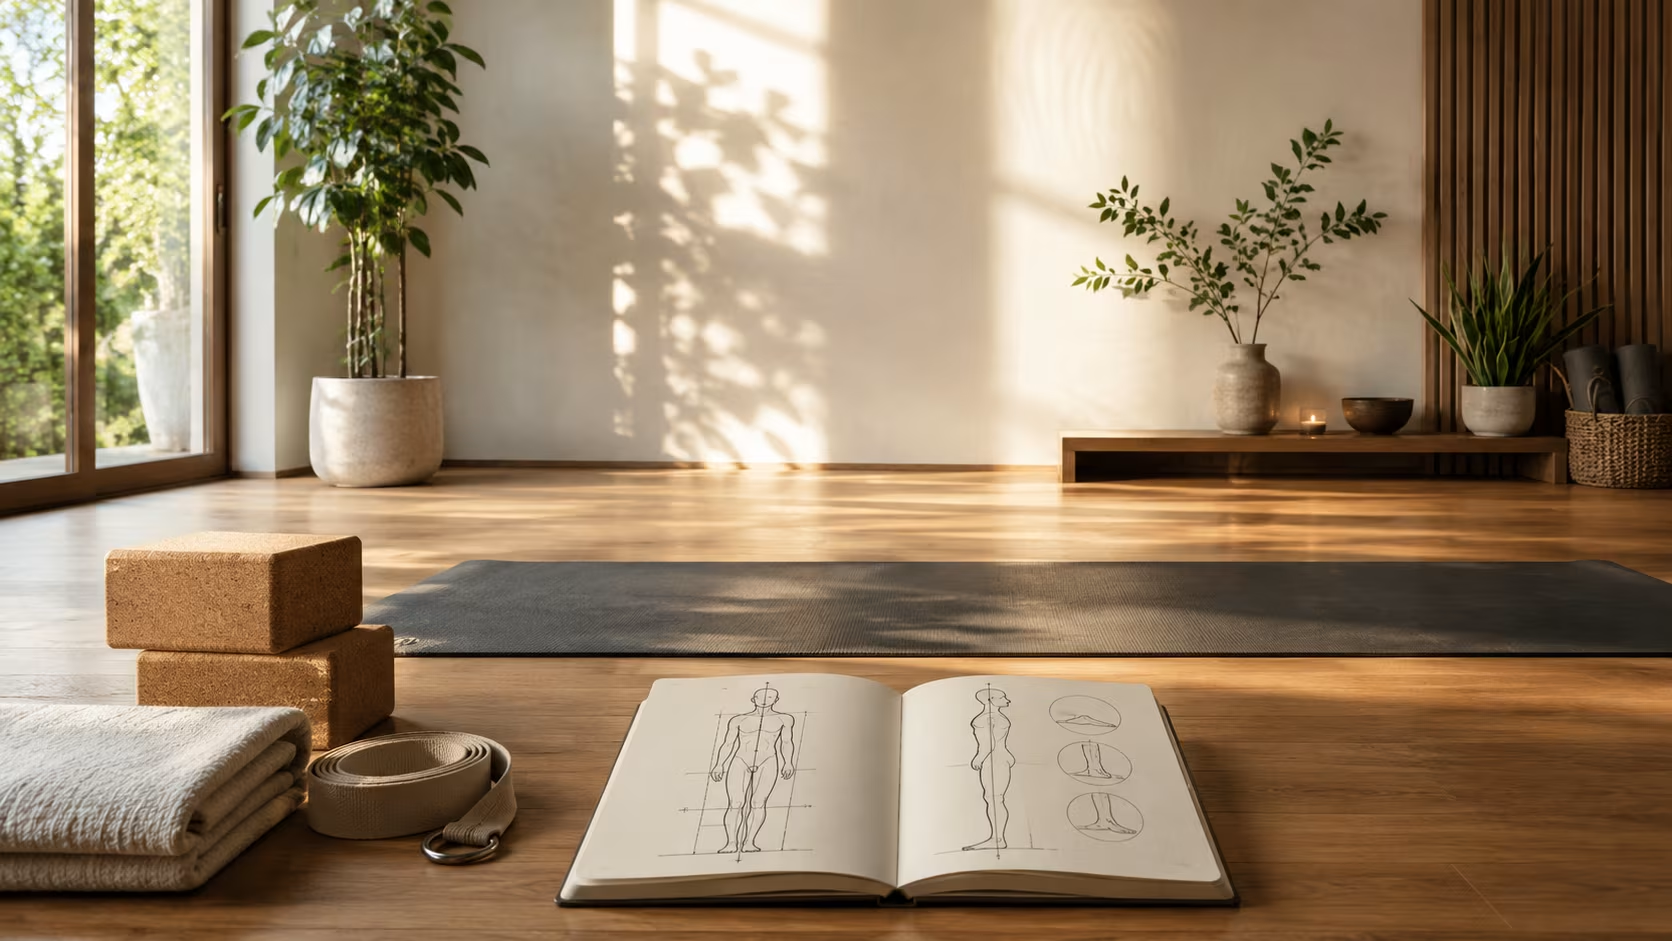
A well-organized mountain pose involves: feet hip-distance apart with weight distributed across all four corners of each foot, ankles neutral (neither rolled in nor out), knees soft (not locked), pelvis neutral (neither tilted forward into a sway-back nor tucked under), low ribs slightly drawn in, shoulders back and down, head balanced over the spine, gaze level. The whole structure should feel grounded through the feet and lifted through the spine.
This isn't fussy alignment for its own sake. Mountain pose is the reset position for the whole sequence. Every other pose returns to or builds from this organization. If your mountain pose is collapsed (rounded shoulders, tucked pelvis, soft midsection), every subsequent pose inherits these problems.
The most common error: standing with weight predominantly in the heels and pelvis tucked forward. This is the default modern adult posture, conditioned by years of sitting, and it carries into yoga unless explicitly addressed. The fix: actively spread the toes, slightly lift the kneecaps without locking, find length through the lumbar spine.
Spend a minute getting your mountain pose right at the start of practice. The whole rest of the sequence improves.
Forward fold and half-lift: spinal articulation
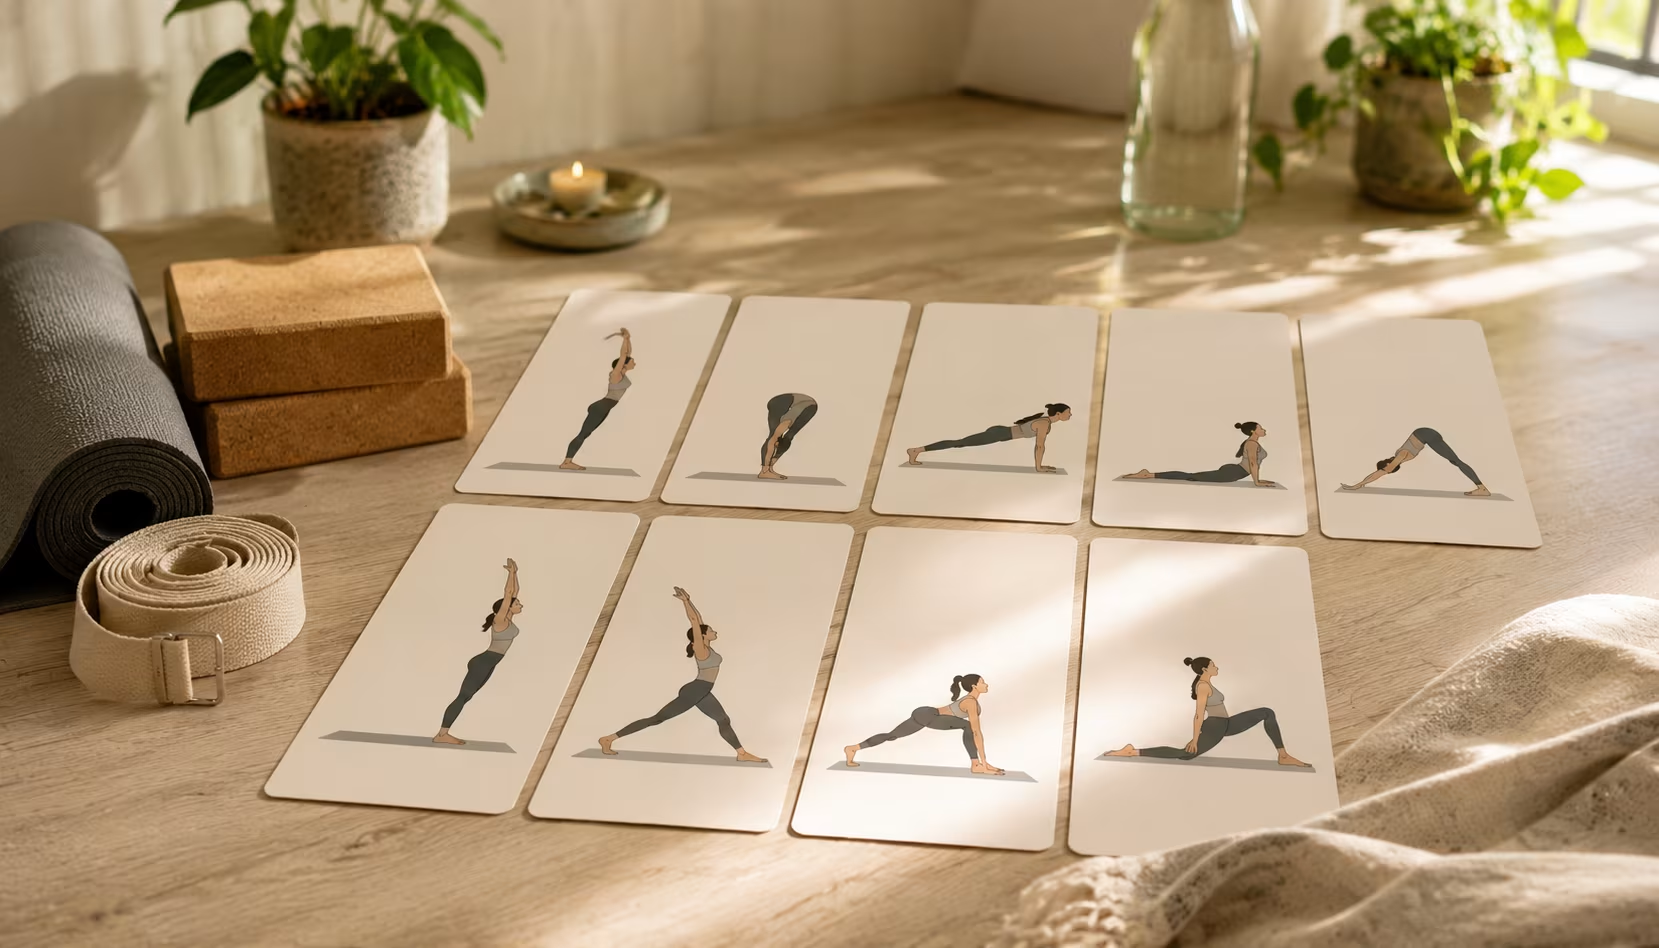
The forward fold (uttanasana) and the half-lift (ardha uttanasana) train spinal articulation under load.
The exhale that takes you into the fold should hinge from the hip joints, not from the spine. A proper hinge keeps the back relatively long while bringing the torso toward the legs. The most common error: rounding the lumbar spine to get the head closer to the legs. This both compresses the discs and trains exactly the wrong pattern for protecting the back during everything else.
If your hamstrings won't let you get the hands to the floor with a long spine, bend the knees as much as needed. The point of the fold is the hip hinge, not the floor contact. A bent-knee fold with a long spine is a thousand times more useful than a straight-leg fold with a rounded back.
The half-lift on the next inhale is where many people glitch. The cue is to lift the chest forward and up while keeping the back flat, with the fingertips on the shins or floor. Most people do something else — they lift the head and round the upper back, treating the half-lift as a glance up rather than a spinal extension. The actual point is to engage the back extensors and create length, which prepares the spine for the load it's about to take in plank and chaturanga.
If you can't find the long-spine half-lift, place the hands on blocks or higher up the legs. Lifted hands make the long spine accessible. Then over weeks, work the hands lower as the hamstrings allow.
Plank: the silent hero of the sequence
Plank pose appears in the sequence as a transitional position — you step or jump back from the half-lift, hold plank for a moment, then lower into chaturanga. In most classes, it gets almost no attention. This is a missed opportunity, because the quality of your plank determines the quality of your chaturanga, and the quality of your chaturanga over years determines whether you keep your shoulders.
A good plank: shoulders directly over wrists, hands shoulder-width apart with fingers spread, weight balanced across the hands (not collapsed into the wrists), shoulders pulled away from the ears, scapulae neither winged out nor pinched together but lying flat on the back, low ribs drawn in, pelvis neutral (not sagging or piked), legs active with quads engaged, feet hip-distance apart.
The whole-body integration is the point. The shoulders, the trunk, and the legs are all working. If your hips sag, the trunk has given up. If your hips pike up, you're avoiding the trunk work. If your shoulders bunch up around your ears, the scapular stabilizers (lower trap, serratus) aren't doing their share.
Most newer practitioners need to spend more time in plank than they think. If you can't hold a clean plank for 30 seconds, your chaturanga is going to be a disaster. Practice plank by itself, outside the flow, until the shape is solid. Then bring that solidity into the sequence.
Chaturanga: where the practice is made or broken
Chaturanga dandasana — the low push-up position with elbows bent at 90 degrees, hovering above the floor — is the most commonly injured pose in modern yoga. Shoulder injuries from poor chaturanga are common enough that they have a name in the medical literature: yoga-related shoulder pain.
The problem is mechanical. Done correctly, chaturanga loads the chest, shoulders, triceps, serratus, and trunk in a coordinated way that requires significant strength. Done incorrectly, it loads the front of the shoulder joint capsule, the biceps tendon, and the rotator cuff in positions they're not designed to take repeated load in. Over time — often years, but sometimes faster — this produces tendinopathy, impingement, or labral problems.
What correct chaturanga looks like from plank, shift slightly forward so that when you lower, your shoulders end up over your wrists rather than behind them. Bend the elbows back, keeping them close to the ribs (not flared out at 45 degrees, which is the most common error). Lower until upper arms are parallel to the floor — elbows at 90 degrees — no further. The shoulders should remain back and down, not creeping forward toward the ears or in front of the elbows. The chest does not collapse; the trunk does not sag.
The two most common errors flaring the elbows out, which puts the shoulder in the impingement position; and lowering past 90 degrees so the shoulders drop below the elbows, which loads the front of the joint capsule and is the position most associated with chronic injury.
If you can't do this. Most people can't, when they start. The honest version is to lower the knees to the mat first, then perform chaturanga from there. This reduces the load enough that the shape can stay clean while you build strength. The strength comes from doing this version correctly for months, not from grinding out bad full-load chaturangas. Knees-down chaturanga done well will build you toward the full version. Bad full chaturangas will build you toward an MRI.
A note on flow speed. In a fast-flowing class, you may pass through chaturanga in less than a second. This is too fast for most practitioners to maintain form. The Ashtanga tradition holds chaturanga briefly with breath, which is closer to the original. If your teacher cues a faster pace than your form can hold, drop the pace yourself. Better to do fewer clean chaturangas than many sloppy ones.
Up dog and cobra: the back extension question
After chaturanga, the inhale takes you into upward facing dog (urdhva mukha svanasana) or cobra (bhujangasana). Both are back extension postures; they differ in how much support the legs provide.
Up dog from chaturanga, push through the hands to roll the shoulders over the wrists, lift the chest, and press the tops of the feet into the mat so the thighs lift off the floor. The whole front of the body is in extension; only the hands and the tops of the feet should be touching the floor.
Cobra from chaturanga or from lying flat, press into the hands lightly and lift the chest, keeping the legs and pelvis on the floor. The arms can be slightly bent or straight, depending on the version. The back muscles do more of the work than in up dog.
Cobra is the more accessible version. Most beginners and many intermediate practitioners are better served by cobra than by up dog. The two key reasons: up dog requires significant shoulder strength and stability to hold the position correctly, and the lifted-thigh position can put substantial load through the lumbar spine if the trunk isn't strong enough to manage it.
The most common error in both poses: dumping into the lower back. This means the back extension is happening primarily at the lumbar spine (which is already the most mobile in extension and doesn't need more) rather than being distributed across the thoracic spine (which is usually stiff in extension and benefits). The fix: actively engage the trunk, draw the low ribs in, lift through the upper chest, distribute the extension along the whole spine rather than collapsing it into the lumbar.
If your low back hurts during back extensions, this is the diagnostic. The pain is from concentrating extension into a small segment that's bearing more load than it should. Move some of the work upstream into the upper back, and the pain often resolves.
Down dog: the unsung mobility piece
Downward facing dog (adho mukha svanasana) is the one pose in the sequence that most people hold for several breaths rather than passing through. It's worth those breaths.
A good down dog: hands shoulder-width apart with fingers spread, index fingers parallel and pointing forward, weight distributed across the whole hand. Feet hip-distance apart. Hips lifted up and back, creating an inverted V shape. Spine long, neither rounded nor hyperextended. Heels reaching toward the floor (whether they touch is irrelevant — most adults' hamstrings won't allow it). Head between the upper arms, neck relaxed.
The pose stretches the hamstrings, calves, and shoulders, while also strengthening the shoulders and trunk. It's an extraordinary general-purpose mobility shape, which is why every yoga lineage uses it.
The most common error: rounded upper back, weight in the wrists, heels held tightly off the floor in a tense way. The fix: bend the knees as much as needed to allow the spine to lengthen. A bent-knee down dog with a long spine is far more useful than a straight-knee down dog with a rounded back. Over time, as the hamstrings open, the legs straighten out.
The shoulder positioning matters. The arms should externally rotate so that the inner elbows face slightly forward, the upper arms hug toward each other, and the shoulder blades wrap down the back away from the ears. This protects the shoulder joints and engages the right musculature.
If your wrists hurt in down dog, several adjustments help: spread the fingers wider, root the base of the index finger and thumb into the mat to redistribute pressure off the wrist proper, lift the heels of the hands slightly using a wedge or rolled towel. Persistent wrist pain suggests building wrist strength and mobility outside of practice.
Putting it together: timing and breath
The sequence is meant to be linked breath-to-movement. Each pose corresponds to either an inhale or an exhale, and the transitions are timed to the breath rather than to a counted beat.
For Sun Salutation A:
- Inhale: arms overhead in mountain
- Exhale: forward fold
- Inhale: half-lift
- Exhale: step or jump back to plank, lower through chaturanga
- Inhale: up dog or cobra
- Exhale: down dog (hold for five breaths)
- Inhale: jump or step forward, half-lift
- Exhale: forward fold
- Inhale: rise to mountain
- Exhale: hands together at heart
The breath should be smooth, audible to you (ujjayi breath, made by slightly constricting the back of the throat), and the same length on inhale and exhale. The movement follows the breath, not the other way around. If you're rushing through a movement to fit it into a breath, slow the movement down and let the breath set the pace. If you're holding your breath through a transition, that's the signal that the pace is too fast for your current capacity.
The breath is what makes the sequence yoga rather than calisthenics. Without it, the same movements are just exercise.
Modifications that actually serve the practice
A few modifications worth knowing. None of these are second-class versions; they're versions appropriate to particular bodies and stages.
Knees-down chaturanga
As discussed above. Use this until you can do full chaturanga with shoulders not dropping below elbows. This is most people, longer than they think.
Cobra instead of up dog
Reduces shoulder load and lumbar load. Appropriate for back issues, shoulder issues, or anyone still building trunk strength.
Bent knees in fold and down dog
Allows long spine when hamstrings are tight. The long spine is more important than the straight legs.
Hands on blocks
Useful in fold, half-lift, and lunges. Brings the floor closer when range of motion is limiting.
Step rather than jump
Jumping back to plank from a standing fold is more dynamic and harder. Stepping is gentler on the wrists and shoulders and just as valid. There's no advantage to jumping unless you specifically want the cardiovascular intensity.
Hand position adjustments
A wedge under the heel of the hand reduces wrist extension. Fists instead of open hands eliminate wrist extension entirely. Both are useful for wrist issues without abandoning the practice.
Skip the chaturanga
From plank, lower all the way to the floor, then push up to cobra. Eliminates the most injury-prone part of the sequence. Some lineages do this routinely.
The point of these modifications is to keep doing the practice while protecting tissue that isn't ready for the full version. The modified version done well builds toward the full version. The full version done badly leads away from a sustainable practice.
Sources
Singleton, M. (2010). Yoga Body: The Origins of Modern Posture Practice. Oxford University Press.
Cramer, H., Krucoff, C., & Dobos, G. (2013). Adverse events associated with yoga: A systematic review of published case reports and case series. PLOS ONE, 8(10), e75515.
Fishman, L., Saltonstall, E., & Genis, S. (2009). Understanding and preventing yoga injuries. International Journal of Yoga Therapy, 19(1), 47–53.
Penman, S., Cohen, M., Stevens, P., & Jackson, S. (2012). Yoga in Australia: results of a national survey. International Journal of Yoga, 5(2), 92–101.
Boehde, D., & Porcari, J. P. (2005). Yoga: an investigation into the energy cost. American Council on Exercise, ACE FitnessMatters research report.
Larson-Meyer, D. E. (2016). A systematic review of the energy cost and metabolic intensity of yoga. Medicine & Science in Sports & Exercise, 48(8), 1558–1569.
Iyengar, B. K. S. (1979). Light on Yoga. Schocken Books.
Frequently Asked Questions
How many sun salutations should I do per day?
There's no magic number. Five rounds will warm and stretch the body. Twelve rounds takes about 15 minutes and is what some traditions recommend as a daily practice. Beyond that, you're getting into endurance training, which is fine if that's the goal but not the original purpose of the sequence.
Why does my wrist hurt during sun salutations?
Almost certainly from chaturanga or down dog with a flexed-back wrist position the small wrist muscles aren't conditioned for. Two fixes: spread the fingers wide and root the index finger and thumb base into the mat, and gradually build wrist strength with light loaded extension work outside of practice. If pain persists, a wedge or a fist position helps.
Can I do sun salutations without yoga experience?
Yes, with modifications. The basic shapes are accessible to most adults. The two pieces that benefit most from a teacher's eye are chaturanga (where bad form gets shoulders hurt) and the up dog/cobra transition (where back overextension is common). A few classes with a teacher first will save weeks of building bad habits.
Sun Salutation A or B — what's the difference?
A is shorter and more accessible: mountain, forward fold, half-lift, plank, chaturanga, up dog, down dog, jump or step forward, half-lift, fold, back to mountain. B adds chair pose at the start and warrior 1 in the middle, lengthening the sequence and adding more leg work. Most flow classes use B with variations.



0 Comments
Leave a comment
Your email won't be published. Required fields are marked with *.